
Canning Tomatoes 101
- wmusings
- Jul 19, 2020
- 4 min read
In the midst of a global pandemic, something feels good and right about getting back to basics and learning something new, especially something our parents and grandparents may have done. My father-in-law, Tate Roberts, learned to can vegetables in his mother, Lexie's kitchen. He and Charlotte, my mother-in-law, would drive to Warren, Arkansas each summer to pick up a load of tomatoes to can. They would use them all during the year to make delicious chili, spaghetti and gumbo. They really do take any soup to another level!
Tate lived with our family for several years and I learned so much from him, especially about food. He would can tomatoes in our kitchen each summer and I would help him and eventually learned it well enough to do it myself. I have since passed the art on to a few friends, and hopefully they will one day pass it on too!
My husband, Manly, and friend and co-blogger, LJ, now help each year and it really goes by so quickly. Manly and I drove to Green Family Farm in Warren to get our tomatoes last year. They are the nicest people and I highly recommend them and their tomatoes!

They have a pick your own option, but we chose to buy boxes they had already picked.


Although Tate canned in the kitchen, it's just too darn hot in Arkansas in July and August to have the gas stove running non-stop for 8 hours, so Manly had the brilliant idea of using the turkey fryer setup and a propane tank to can them in the carport.

The following are all the supplies you will need to get started canning:

A jar lifter linked here
A pressure cooker linked here
A large scoop colander linked here
Large plastic bins linked here or any large bowls
Quart sized mason jars linked here. I like the wide mouth jars, but you can use regular mouth and can also used pint sized jars if you think you may not use a quart of tomatoes at a time.
Also, from year to year, you can reuse the jars and rings, but will need new lids. Wide mouth lids linked here
You won't need to buy new rings often, but if you do, here is a link

We like to get everything set up before we start...the other things you'll need are a couple of bags of ice, some salt (I just use either regular Morton salt or kosher salt, but there is canning salt that has no additives or iodine in it), a sharp paring knife and a large pot other than the pressure cooker.

First, you will want to get the peel off of the tomatoes. Fill a large pot (not the pressure cooker) with water and bring to a boil. In the photo above, we just set this cookie sheet on top to bring to a boil more quickly, but you don't have to do this!

In the meantime, put ice in the plastic bins. Gently place 5 or 6 tomatoes in the pot and let them float back to the top, maybe for a minute or so. Then lift them out with the large scoop and place them in the ice to cool down.


Begin peeling and coring the tomatoes. Start stuffing in the jars until they are very close to the top, leaving only about an inch or so at the top.

After the jar is full, add a teaspoon of salt to the top for a quart size, half a teaspoon for a pint size. Then wipe the jar clean and place a new lid and a ring on each jar. Tighten well.

I put about 4 inches of water in my pressure cooker. If you are buying a new pressure cooker, I would just go by the instructions. Place the tomatoes in the pressure cooker. My cooker holds 7 quarts. Depending on the size of your pressure cooker, you may do more or less than that.

Close the lid tightly and put the weight on top, with it turned to the correct poundage. My pressure cooker uses 5 pounds of pressure for 10 minutes. This means that after you close the lid, the pressure cooker will heat up to the point that it gets to 5 pounds of pressure. At this time, the weight begins to jiggle and you will start your timer for 10 minutes. Keep the heat at the correct temperature that the weight continues to jiggle for the entire 10 minutes. When the 10 minutes is up, turn off the heat and let the pressure naturally decrease. DO NOT OPEN THE LID AT THIS TIME. Also, do not try to cool the lid down to speed up the process. Turn on a fan, make some tea, and sit and enjoy the process.
When you can touch the weight with a wooden spoon and it stops spewing steam, it's safe to remove the lid. Admittedly, all of this can be a little scary the first time you try this...once you get the hang of it, though, it's easy and no big deal!

This is when you use the jar lifter to lift the jars out of the pressure cooker. I usually have a towel set out on my plastic table or counter because the jars are really hot! I place them there to cool down. Then repeat the process until all tomatoes are finished. It's so neat because soon you will hear the lids sealing and there is a little "pop" when it is sucked down onto the jar. Very satisfying :)

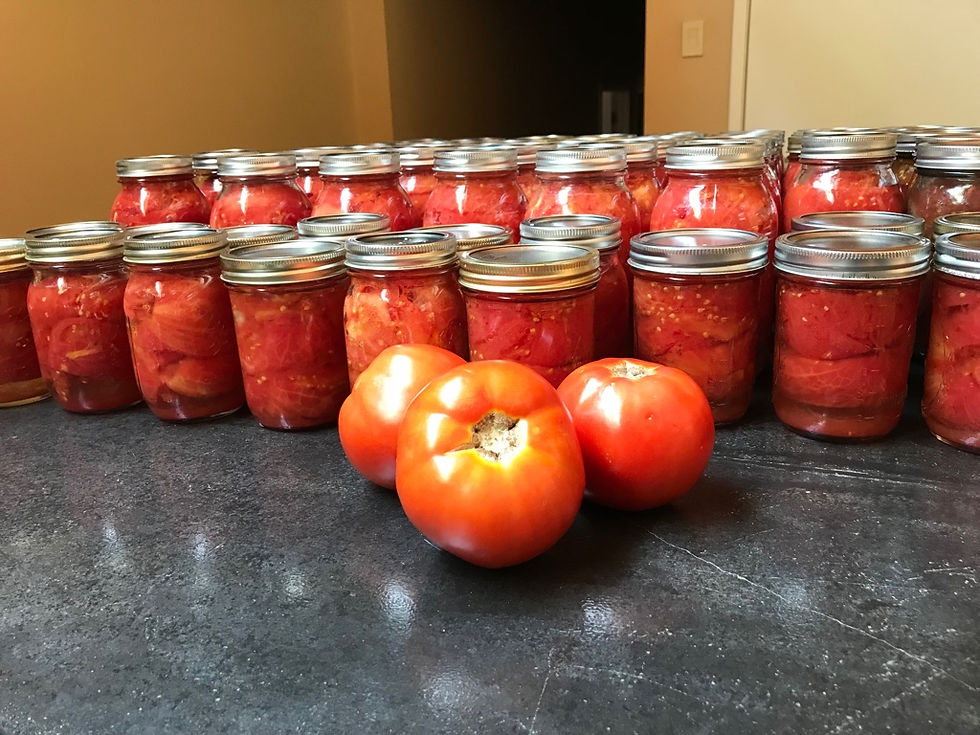
This is how many quarts those 7 boxes of tomatoes made last year! I believe it was a little over 50 quarts. We actually have quite a few leftover so we plan to do only a few this year! They also make a thoughtful gift for friends and family.

There really is nothing like the experience of learning a craft or trade from times past, such as gardening, canning, or sewing. If your parents or grandparents taught you any of these things, count yourself as blessed!
Let me know if you give it a try!
Maybe my next post will be something I cook with the tomatoes, like Tate's gumbo. Stay tuned!
Lisa
I’m going to have to give this a try with Tammy!
They look great! Haven’t done this in a long time!!!